Patching Models
Thanks to the way Depraved Sense needs an armature change for its main features like animated genitals, and belly to work. Every single model out there WILL need to be patched in order for those features to work properly. Or else people might get invisible genitals or static body parts.
So, in here you will learn how to do a simple patch for any model you wish to, with your OWN HANDS. We’re going to mainly use Blender as a 3D tool for our objective, but any other software that allows GLB/FBX files, and armature edit, will also work. Don’t worry, the steps are pretty simple if you tag along!
BUT! Before we go any further, it is highly recommended that you get permission of the original author as best as you can. Unless the model was abandoned, it is good practice to know when not to cross the line between stealing models without consent, to avoid any complicated discourse later on.
With that out of the way, let’s begin.
Loading The Model
First, we need a target model to apply our patch. Mods downloaded through the Steam Workshop mostly lie at Steam/steamapps/workshop/content/108600/WORKSHOP_ID_OF_THE_MOD/mods/MOD_NAME/, where the model itself is at MOD_NAME/42_or_common/media/models_X/Skinned, keep in mind that not every mod stays at that location, sometimes mods may stay at the cache folder or any outside place. Either way, make sure to localize MaleBody, FemaleBody, and if there is any, Male_Skeleton, and Female_Skeleton.
In this case we are gonna utilize the main vanilla model of Project Zomboid as a target, but let’s pretend it’s a modded one for this case scenario. First we open Blender (our chosen tool for this guide), and start a new session.
Now, let’s make sure we have a clean slate for ourselves. Press A (select all) on the screen, and then X (delete) to exclude all objects in our scene. Next step will be loading our target model. You can either click and drag the file to Blender, or go to File > Import > FBX or glTF.
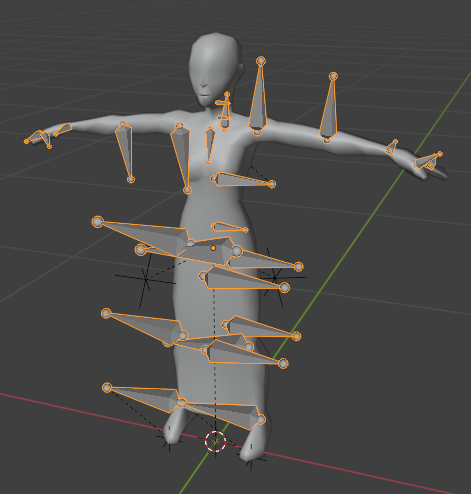
If done right, you might see a model similar to this. The bone shapes might look different, but if you see your model on Blender without any corrupt form, you are on the right track.
Choosing A Method
There are many ways of patching a Zomboid model. One of them is adding the new bones yourself manually and making sure their parenting is right. But in here we’re going to follow the easiest method, which is replacing the model’s armature completely. This method avoids possible small errors that a beginner with Blender can commit, not to mention that it is way faster at the end of the day.
Loading The New Armature
Repeat the same method when loading the character’s model, however this time with DepravedBodies.glb. When loading you will meet with 5 models inside the new armature structure.
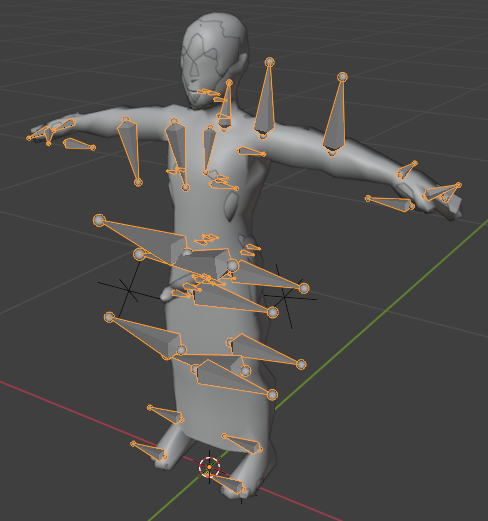
Most models here are for reference only, if you wish you can hide them.
Aligning
Now, we need to make sure that the new armature is at the right position in relation to the character’s model, so look for Bip01_Pelvis. We’re going to use that bone as our point to align our armatures. Make sure you’re in Object Mode on this step, and select any of the Bip01 armatures in the viewport, or in the explorer on the right (It might be named Bip01.001 if you’re selecting the new armature). Press Numpad 3 on your keyboard to view exactly one side of the armature, or alternatively go at the top of the screen and select View > Viewpoint > Right.
It is also recommended to use . on the keyboard to focus on the selected object (or View > Frame Selected). And to toggle Xray by pressing Alt + Z or clicking at the two squares at the top right. You can also hide the models to expose the armature better. The best mode for the viewport to do this is the Wireframe which can be set in the top right corner of the viewport.

With the armature now at fingertips you should see something like this if you followed things correctly. Don’t worry if things aren’t 100% accurate to your situation, as long as you can still control the armature’s position everything is okay.
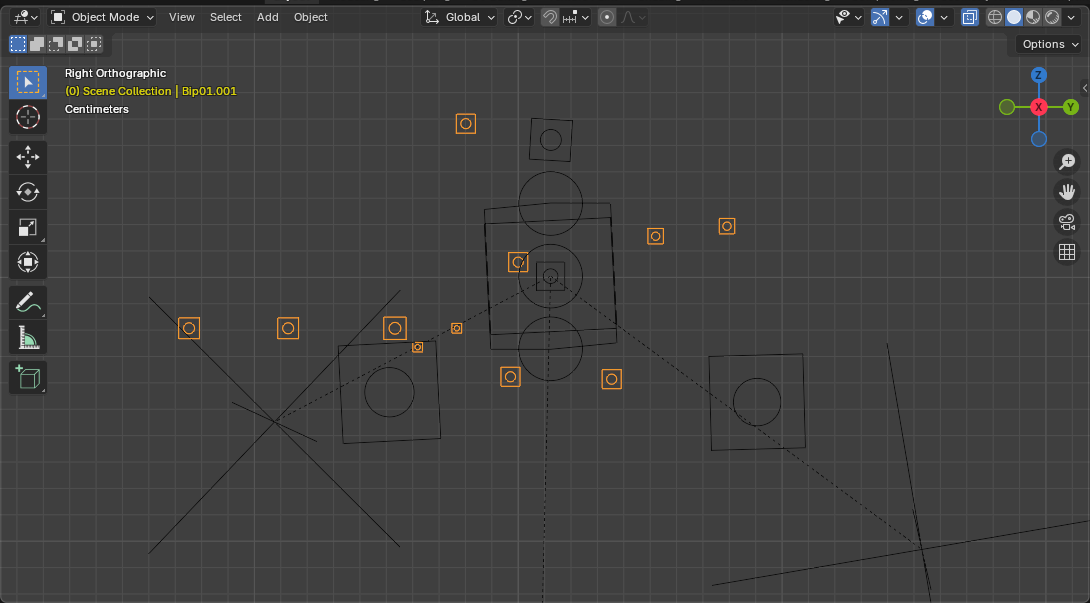
Our main objective now is to align the armatures. First you need to identify which of the bones is Bip01_Pelvis, and once you do, it’s time for action. Press G on your keyboard. It will allow you to move the armature according to your mouse. Then, move the Bip01_Pelvis right where the target is. It doesn’t need to be 100% exact, just close enough to the point to not notice any difference. Move with the Shift key held down to make more precise movements as you go.
Changing the view point to Front with Numpad 1 or View > Viewpoint > Front helps a ton.
Once done, both armatures should be aligned correctly.
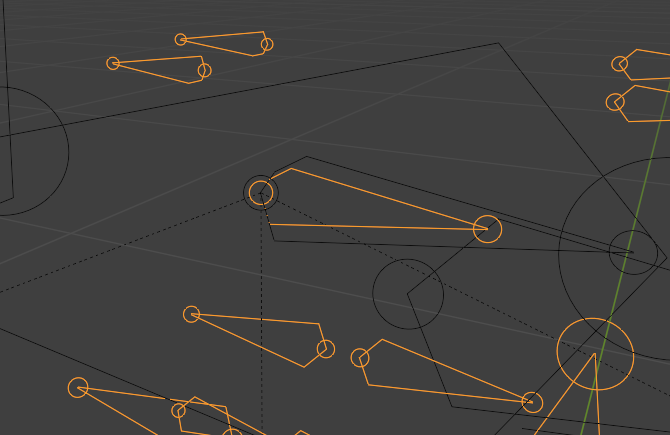
Note: In some rare cases some bones might be offset. You will need to check if everything is really aligned.
Reparenting the model
Since we got both our armatures aligned, it’s time for us to move our target model to its new armature. We can do this by selecting the model first then our new armature at the explorer by holding Ctrl.
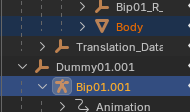
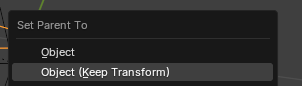
After selecting them, press Ctrl + p with the mouse on the viewport. A menu will appear asking how you want to change the parenting. Choose Object (Keep Transform). The transform ensures that the model won’t change positions when changing the armature.
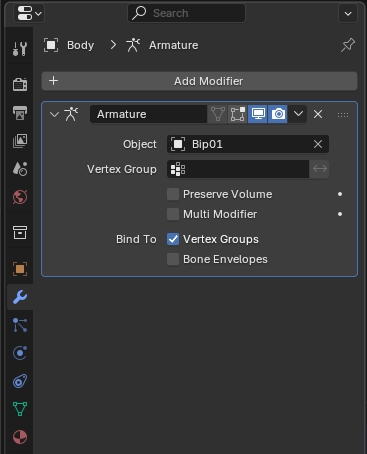
Now, you need to change the target armature modifier to our own. Select the target model, go at its properties, and open the modifiers tab (the blue wrench icon). There you will see an armature modifier already in place. The next step is to change the object it is referencing to our new armature. In this case it is Bip01.001.
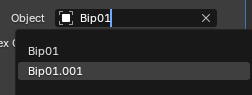
Doing this makes the model we are patching to use our new armature from this point on.
Object Deletion and Renaming
You might have noticed that our pack has repeated names like Bip01.001, and we still have the old one lurking around. What we need to do now is do a simple cleanup.
Select all the old objects from the old armature, and press X to delete them. After that go to our own object and remove the 001 from them. This way Zomboid will detect the model properly. In the end your final structure should be like this.
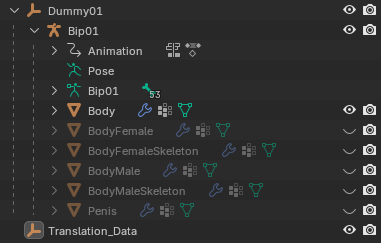
From this point on the model itself already has support for animated genitals! Penises should appear, and move as they are supposed to. However we are still not done yet. If we want more animated body parts like breasts, mouth, and support for belly deformation, we need to do one more extra step.
Weight Painting
Here it comes the most complicated part for the model, Weight Painting. If you’ve never done it before, it is recommended that you get the basics of how this tool works first to avoid some complications. But essentially, it is the method of adjusting how a model deforms with any specific bones.
We start by creating the necessary Vertex Groups for our new bones. You can find the section for it on the properties, and selecting the Green Triangle.

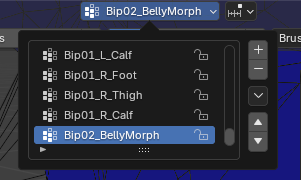
On the right you should see a section containing all Vertex Groups the model has. Click on the + sign on the right, and add Vertex Groups with the new bones you intend to Weight Paint. In this case we are going to start with Bip02_BellyMorph, the most complicated one to adjust.
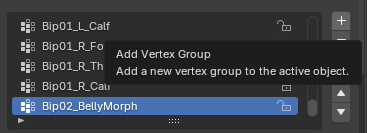
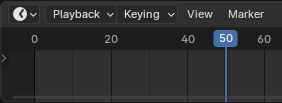
The DepravedBodies.glb we loaded should be used as a reference to how any bone should deform the model. If you’re patching a female model, it is recommended that you keep both female models visible in order to compare them. The models also came with an animation showing how far the Bip02_BellyMorph will go in game. So, make sure to go at the playback at the bottom, and place its playtime after 40 frames. This will position the bone at its final state, and you should see the model change with it.
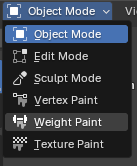
Select the target model, and switch to Weight Paint at the top left corner. (Make sure to enable mirroring on the top to make it symmetric)
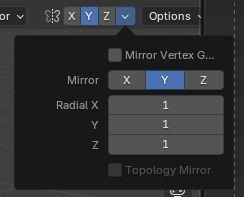
Now, all you need to do is select the Vertex Group of Bip02_BellyMorph to paint over the regions affected by that bone. Once you do, your job will be to align the belly morph in reference to our depraved model. (You can erase your paintings by holding Ctrl)
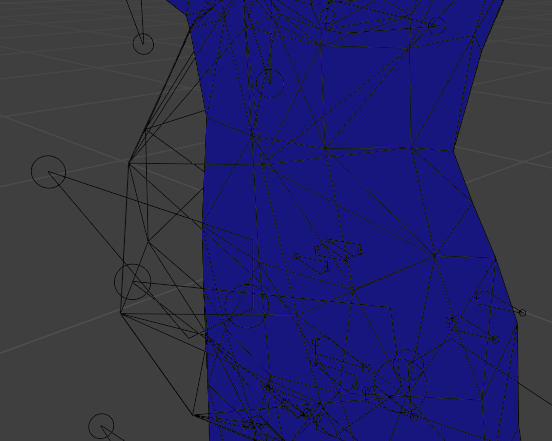
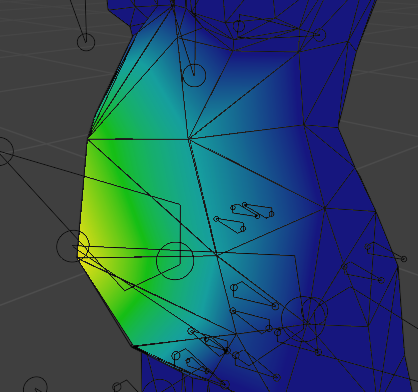
And done! You just finished Weight Painting a single bone. Now you need to do the same with all the rest of the Bip02 bones. Of course some are not going to be needed depending on the model, a good example is the female genital bones like Bip02_VaginaMorph.
Exporting The Model
Assuming you’ve got everything right, and the model patch is complete. You can finally export your own creation! First select the exact objects in this image by holding Ctrl.
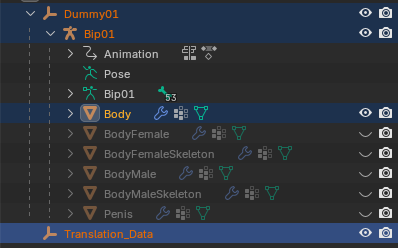
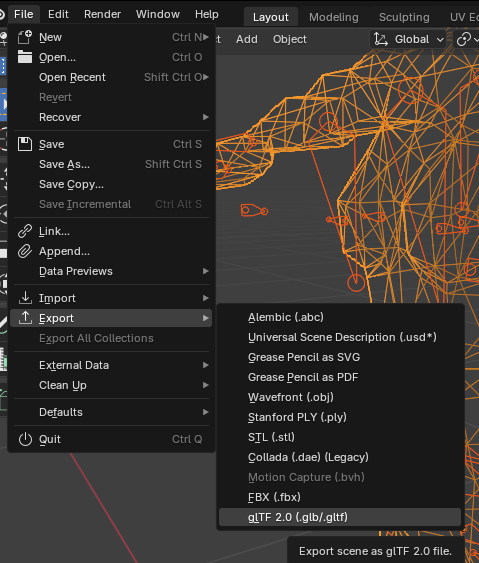
Now in the top left corner of Blender go to File > Export > glTF. And put this exact config for your export.
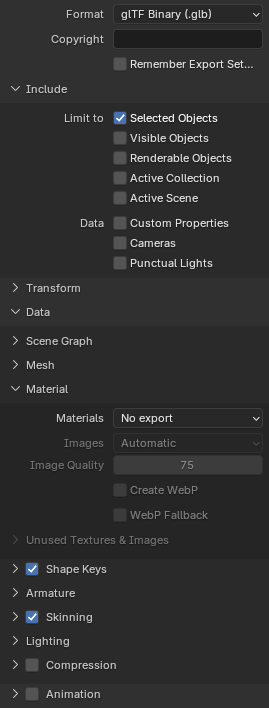
The file name matters a lot for Zomboid, as it dictates what model you are modifying. So, here’s a list of names to consider.
MaleBody for males.
FemaleBody for females.
Male_Skeleton and Female_Skeleton for skeletons.
Once exported, the model should be placed at media/models_X/Skinned in your mod’s folder.
Armature Merging (Manual Method)
In case you’re patching an animated rig or you prefer doing things your own way, you can load DepravedBodiesPatch.glb or DepravedBodiesAnimationPatch.glb if you are indeed patching an animation rig (The reason for this is that animations need a different transform set on the bones to work properly on the game). But before doing this method, you need to clean the armature itself.
It’s very common for mods to have unnecessary bones that just mess the armature structure, often being leaf bones called Nub or duplicated ones. These bones add nothing to the skeleton of the model, and NEED to be deleted if found.
So, you gotta make sure that the armature is a clean slate to make sure things go well. To do that first click on any bone on the screen, this will highlight all the bones of the model.
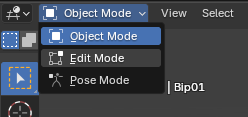
Then you need to go into Edit mode to be able to modify the bone structure. Go to the far up-left corner of your screen, and select Edit Mode. Or you can simply press Tab to quickly go into that mode.
Now, let’s check the list of the vanilla structure. These are all the bones that the model should have.
Bip01
Bip01_Pelvis
Bip01_Spine
Bip01_Spine1
Bip01_Neck
Bip01_Head
Bip01_L_Clavicle
Bip01_L_UpperArm
Bip01_L_Forearm
Bip01_L_Hand
Bip01_L_Finger0
Bip01_L_Finger1
Bip01_R_Clavicle
Bip01_R_UpperArm
Bip01_R_Forearm
Bip01_R_Hand
Bip01_R_Finger0
Bip01_R_Finger1
Bip01_BackPack
Bip01_L_Thigh
Bip01_L_Calf
Bip01_L_Foot
Bip01_L_Toe0
Bip01_R_Thigh
Bip01_R_Calf
Bip01_R_Foot
Bip01_R_Toe0
Bip01_DressFront
Bip01_DressFront02
Bip01_DressBack
Bip01_DressBack02
Bip01_Prop1
Bip01_Prop2
Translation_Data
Note: On animation rigs it is common to have control bones that are specialized on moving the root ones. You can leave those intact.
You gotta make sure the model doesn’t have any extra things outside of it. One thing to note is that Project Zomboid treats everything as a bone, including objects that aren’t in the armature. So you got to make sure you take those into account.
At this point you should try to find any extra bones on the armature. In most cases they have Nub at the end of their name, but it can vary. You can use the search bar at the explorer in the right tab. Once you find an outsider bone, move your mouse on top of the bone on the screen, and press X to delete it. With enough patience, the model should be clean eventually.
The patch armature too has an extra bone called neutral_bone. That bone is only there to ensure that the pack armature stays correct. You should also delete that bone.

Once you’re ready you can merge both the patch armature, and the vanilla one by selecting the patch first, the target second, then pressing Ctrl + J to join them together.
Conclusion
And there you have it. At this point you should get a grasp on what to do to patch other models out there to make it compatible with Depraved Sense. Of course some steps are complicated to manage, and some problems arise out of thin air. If you’re having any problems with this workflow, don’t be scared to ask for help at the LoversLab Forums, and on the Discord!